Before getting to this step , make sure you have followed the setup instructions in the setup document and tutorials. http://recursivetechnology.com/documentation/VA2InstallationinstructionsAlt2.htm . Generally, you need to run the Database install scripts, Install the Central Service, install the Local Server Monitors (LSM) and install the VA2 MMC console. An ODBC connection will also need to be made on each host as part of the installation process. After those steps you’ll be ready for this tutorial, which covers post install configuration steps.
You will have VA2 MMC console installed at this point as part of the setup steps. Before launching the MMC console for the first time after the install, you should run the Register DLL file.
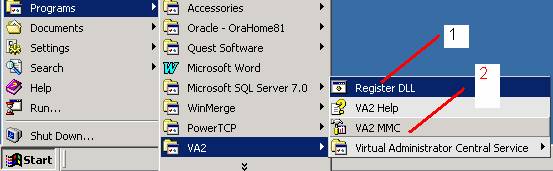
When the Register DLL (step 1) batch file runs and exits very quickly. It registers the necessary DLLs in order to do the next step, which is to open the VA2 MMC console (step 2). When ever you want to access the VA2 GUI, you can run the VA2 MMC program. The Register DLL step is only necessary the first time.
Once the VA2 MMC Console is open, you may need to set the Data Source. If the Data Source has not been set, a Dialog box will pop up, asking for ODBC name and password. You need to fill out the ODBC name and password to the VA2 repository in this step. Information about setting up ODBC names and passwords are available in the ODBC Creation guide. http://recursivetechnology.com/documentation/ODBC_Creation_Guide.htm
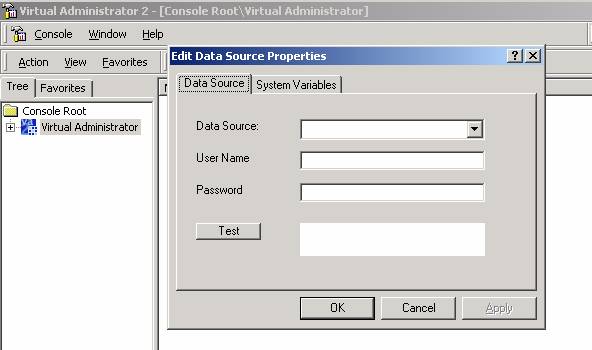
Data Source box allows you to select the ODBC data sources defined on your machine. In this case, you’ll want to select the ODBC data source you created during install that connects to the VA2 repository. Set the user name and Password, and press the test button. If you get a Success! Message, you are ok for the further steps. If the test fails, you must ensure your ODBC connection is set up properly.
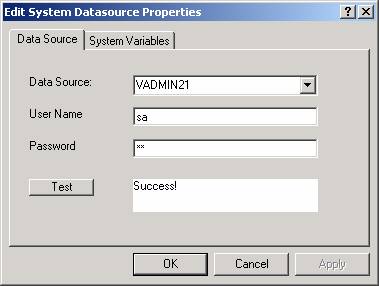
Press OK to save the settings. To Access the System Data source Properties tab in the future, you can in the future Right Click on the Console Root > Virtual Administrator icon and select Edit.

At this point you can navigate through the VA2 Console, and examine its data. In this tutorial, we are examining the Managed Software Systems tab, and under it we want to make sure the Central Service and the LSM services are running properly.
If you can walk down the tree of the Managed Software Systems > Virtual Administrator 2 > vlsm:LSM, that means the whole system is installed, including Central Services and Local Service Monitors. In this case you should see something like this:
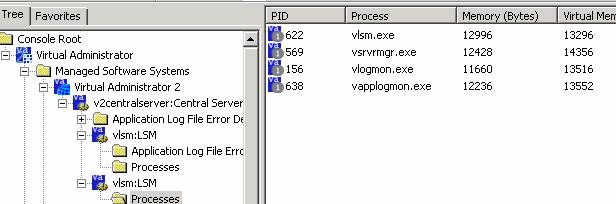
If you are able to view the Processes Folder for the LSM services, you have a successful LSM installation on that host, and verification of Central Service and LSM services are complete.
If the Central Service, or the LSM services are not running, you will not be able to view them from the MMC console. Instead, you will get an error, such as this:

This error means that the Central Server is not running. You will get a similar error if the LSM service is not running. Only when both the Central Service and all the LSM services in the environment are running should you go on to the other tutorial steps.
If your using VA2 to monitor Siebel, you should verify that the Siebel Information is being collected correctly. If all the setup instructions were followed, including running the siebelsetup.exe program, you should be able to verify that important Siebel information is viewable via the VA2 MMC console.
The siebelsetup.exe program imports your Siebel environment into the VA2 environment. If this program was run during setup, you should see a Siebel environment under your Managed Software Systems folder in VA2.
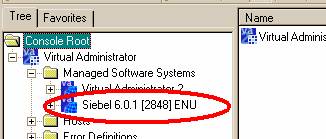
At this point the Central Service and LSM Services should be running. This will allow you to drill into the Siebel environment, and view the information VA2 is collecting on you Siebel environment.
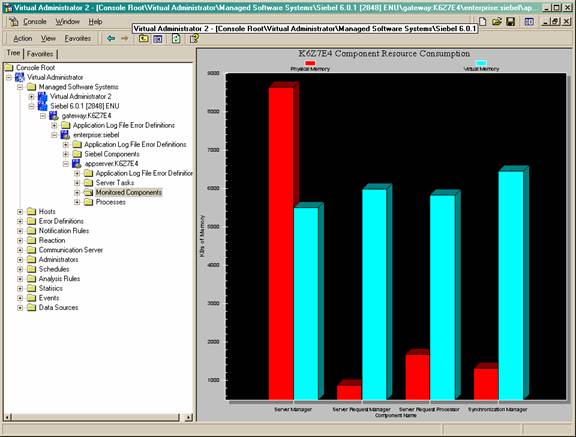
In this view, we drill down to the Monitored Components folder, and view the VA2 representation of your Siebel environment. If you get a port error, and VA2 is unable to verify the Central Service or LSM are running, you will not be able to view the Siebel information. If you can see collected Server Task and Monitored Component information, you are in good shape, and the install has worked, and your VA2 environment is ready for further configuration.
If there is no port error, but there is no Siebel information collected in the Server Task or Monitored Component folders, see the Siebel Setup Tutorial guide for trouble shooting steps.

We can further view the Memory utilization from this view, by select the Graph Menu item on the Monitored Components folder. There are also graphs available from the Processes folder.
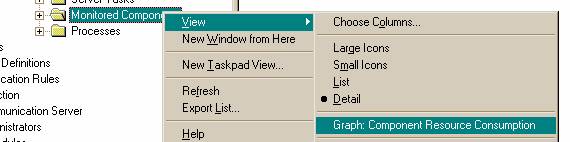
And this will display the graph. This shows the Virtual Memory and Physical Memory for each component in the Siebel environment.